Download an STL or 3MF from the Creality Cloud app, fix or customize it in Forma3D, and send it straight back for cloud slicing — no desktop in the loop.
Updated November 10, 2026 · Published by Forma3D
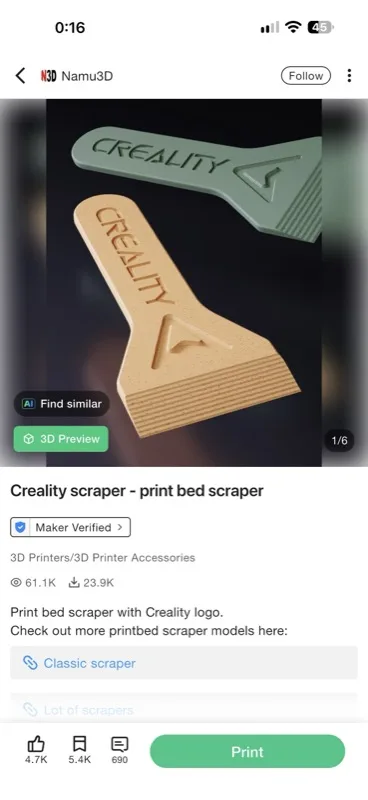
Launch Creality Cloud on your iPhone or iPad and browse the model feed, your library, or search — every community model page has downloadable files attached. For this walkthrough we're using the Creality scraper — print bed scraper by Namu3D.
Tap the model card to open its page — you'll see the 3D preview, the author's description, and the green Print button. Don't press Print yet: we want the raw file, not the pre-sliced profile.
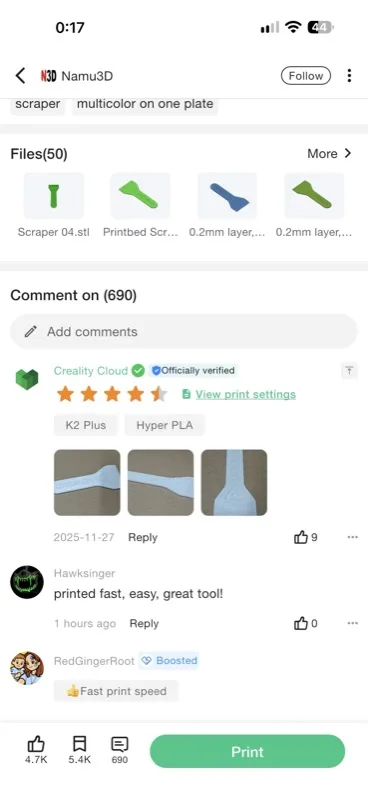
Scroll down past the description and likes until you see Files with a count badge — this model has 50. Tap More (or the section header) to open the full file list.
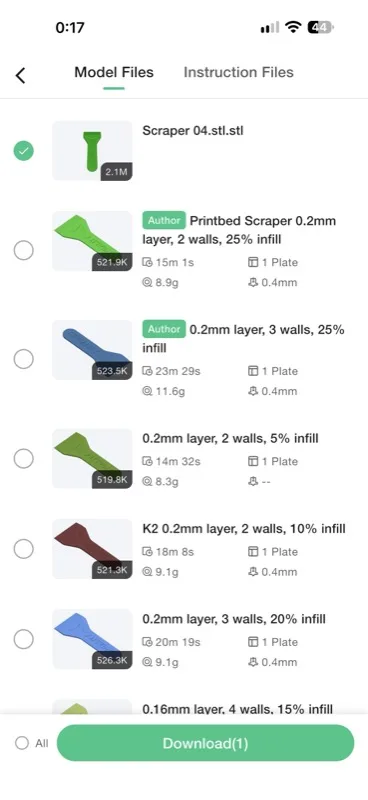
In Model Files, tick the file you want — an STL or 3MF source, not a sliced G-code profile — and press Download. Creality Cloud wraps the file in a ZIP archive and saves it to Files.
In Forma3D press Import and choose the downloaded ZIP in the Files browser — or share it to Forma3D straight from the download. Forma3D unpacks the archive and imports the model inside, no manual unzipping.
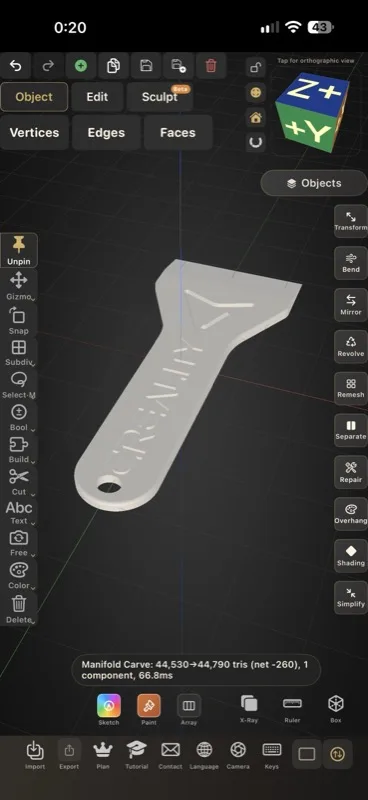
Now the interesting part — everything runs on-device: enter Edit mode and work at vertex/edge/face level, scale the model to fit your bed, repair non-manifold geometry, or paint faces for a multi-color print. Here we're tweaking the scraper's handle in vertex mode.
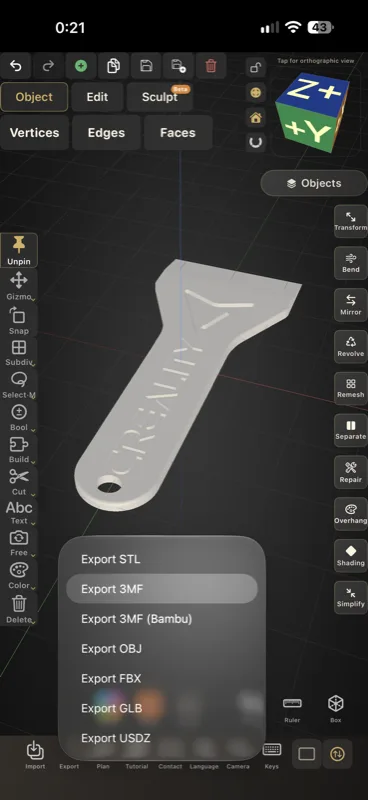
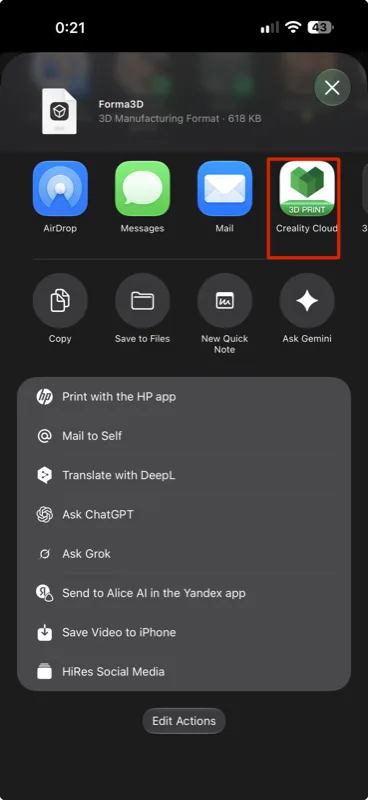
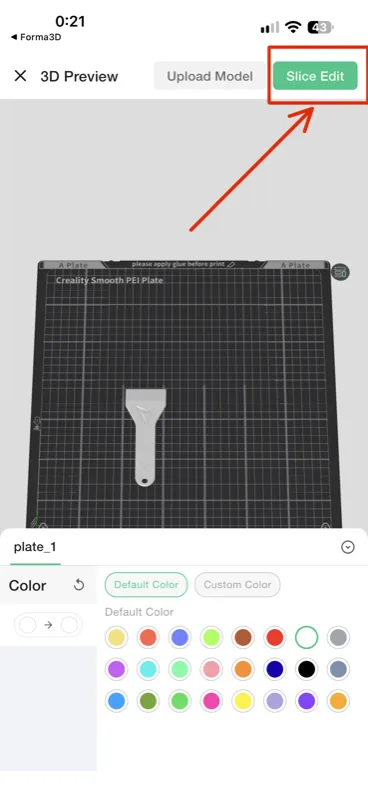
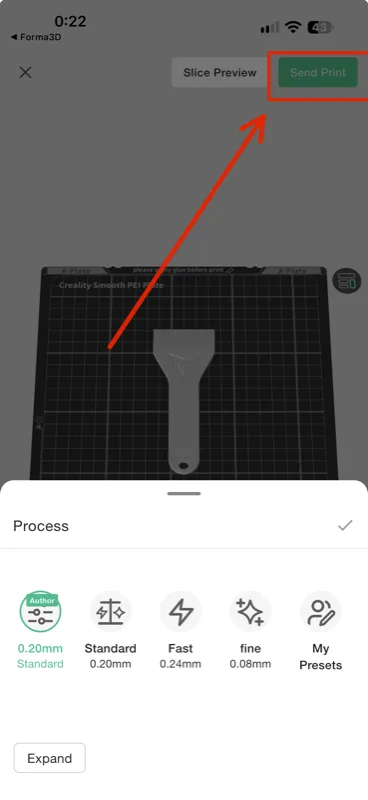
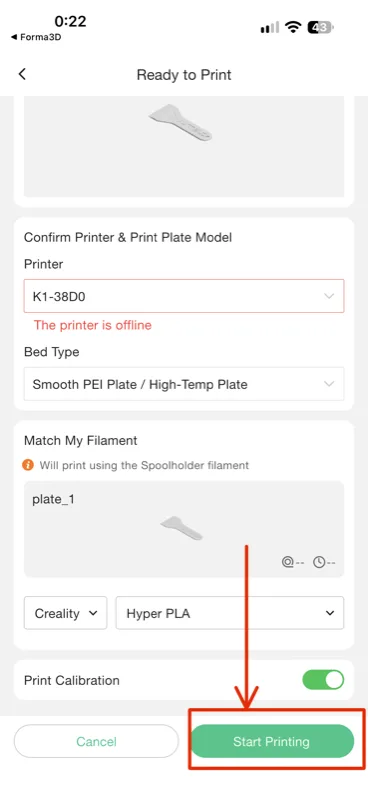
Press Export → STL or Export 3MF. Save to Files for later, or use Share and pick Creality Cloud — the edited model opens inside the app on your printer's virtual plate. From there: Slice Edit to tune quality/supports, Slice Preview to check the layers, Send Print, and Start Printing once the printer shows online.
Yes — pick the ZIP in the import dialog (Files app or share sheet) and Forma3D extracts and imports the model inside automatically. You never unpack the archive manually.
3MF if the listing offers it: it can carry color regions and print settings. STL works everywhere and is fine for plain single-material models. Both edit the same way in Forma3D.
No — share the exported STL/3MF back to the Creality Cloud app and use its built-in cloud slicer: Slice Edit, Slice Preview, then Send Print to your printer.
Yes, identically — Creality Cloud and Forma3D both run on iPad, and the download → edit → share chain works the same way.
Available on iPhone and iPad
 Forma3D